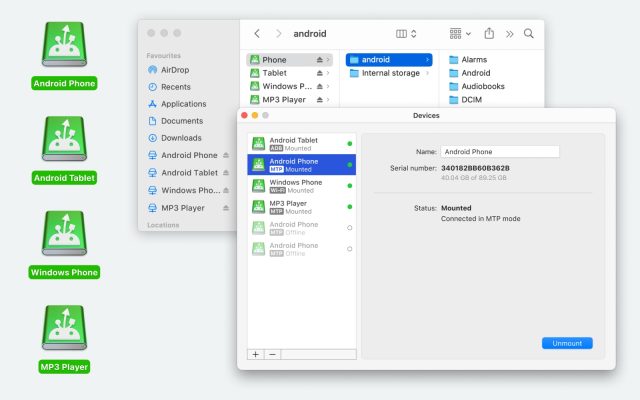
Transferring data to and from your Android device can be a challenging task, especially with so many different operating systems out there. For example, a person can have an Android phone, a macOS computer, an iOS tablet and several other gadgets that need to be connected or synced. This is well beyond the classic iOS – Android incompatibility since you’re dealing with lots of different operating systems that need to work together.
There are many instances when an Android data transfer is required. For example, when you change your phone. You’ve just got an amazing deal for the new iPhone but you had an Android device before? No worries! Switching the data from one to another is the least of your worries. In the paragraphs below, you will find many ways to move files and sync phones on various operating systems.
Sooner or later, we all need a no-compromise Android data transfer app and it’s better to be prepared for any circumstance. Transferring data from your old phone to the new one, or simply syncing your Android device with any computer, no matter the Operating System (macOS, Windows, ChromeOS, Linux etc) is going to be a piece of cake following the steps below!
How to transfer data from Android to Mac and vice versa using MacDroid
There are three methods of connecting Android devices to computers to transfer videos from Android to Mac: ADB, MTP, and Wi-Fi mode.
ADB is a more advanced method that requires enabling debugging mode on Android. It’s faster than MTP, and offers access to every file on the phone. ADB is often used by programmers and power users, but it’s more work to set up and it allows you enough access to break the phone if you are not careful.
MTP is a simpler, more secure method of transferring files. It’s a lot easier to set up and protects important files from being accessed. It’s slower than ADB, but it also keeps sensitive files on your phone safe. Either method will require you to connect Android to Mac using a USB cable. You can usually use the charging cable that came with your Android, though some new Mac laptops might require a USB-C adapter.
Wi-Fi mode allows you to manage and transfer files between Android and Mac without the need for a USB connection. Unlike ADB or MTP, Wi-Fi mode provides seamless cable-free operation. While it’s not as fast as ADB, Wi-Fi mode is still a reliable choice for file transfer, providing a balance between convenience and accessibility.
If you want to use MTP to access your files:
1. Just start up MacDroid and click on “MTP mode” in the Add devices section of the sidebar.
2. Connect your Android to your Mac using a USB cable, and the Android device will ask what kind of connection you want to use.
3. Tap “File Transfer” and accept the selection if necessary.
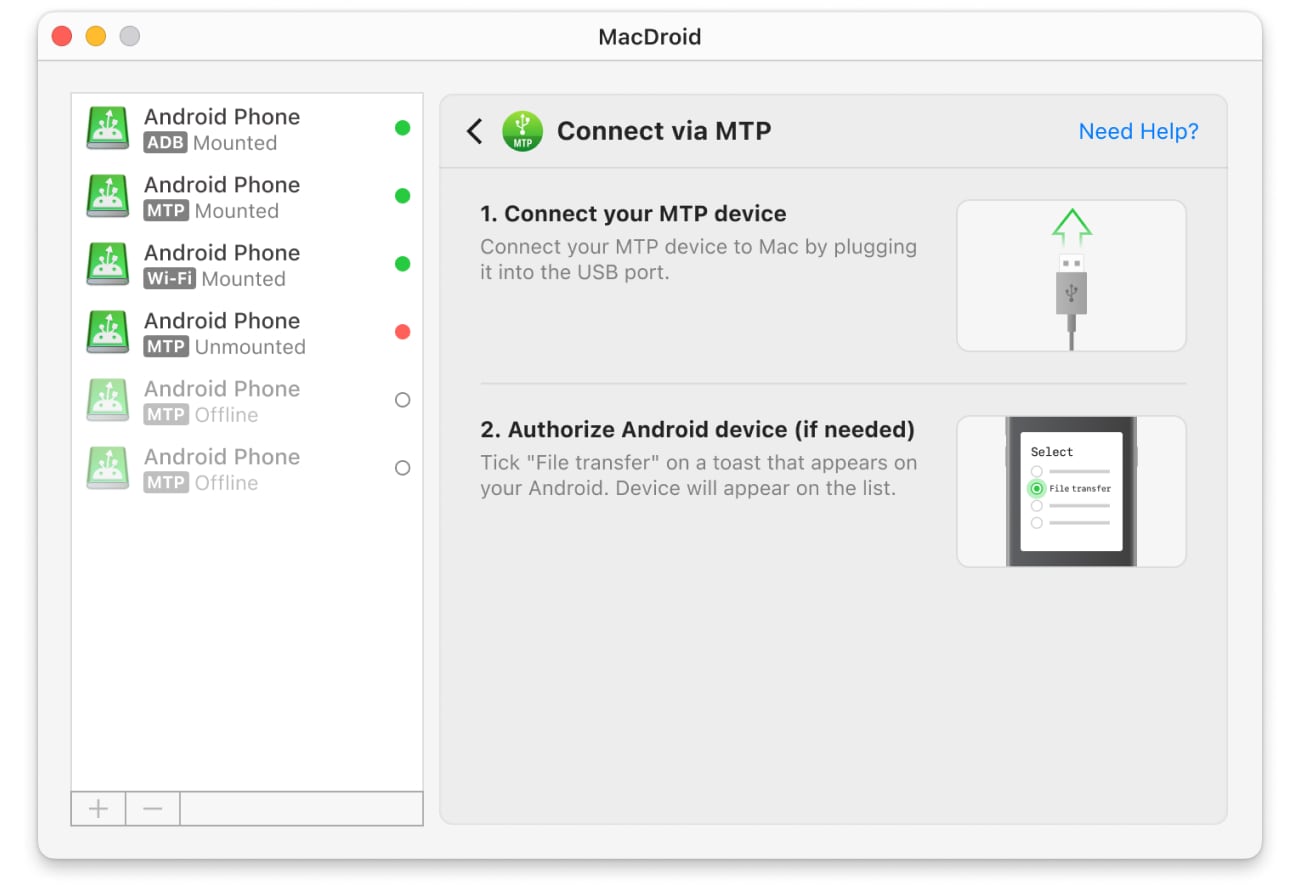
4. Once your Android appears in your MacDroid sidebar with an MTP icon, click on it, then click “Mount” in the main MacDroid page to connect the phone. It will appear in your Finder as an external drive. You can then transfer songs from Mac to Android as needed.
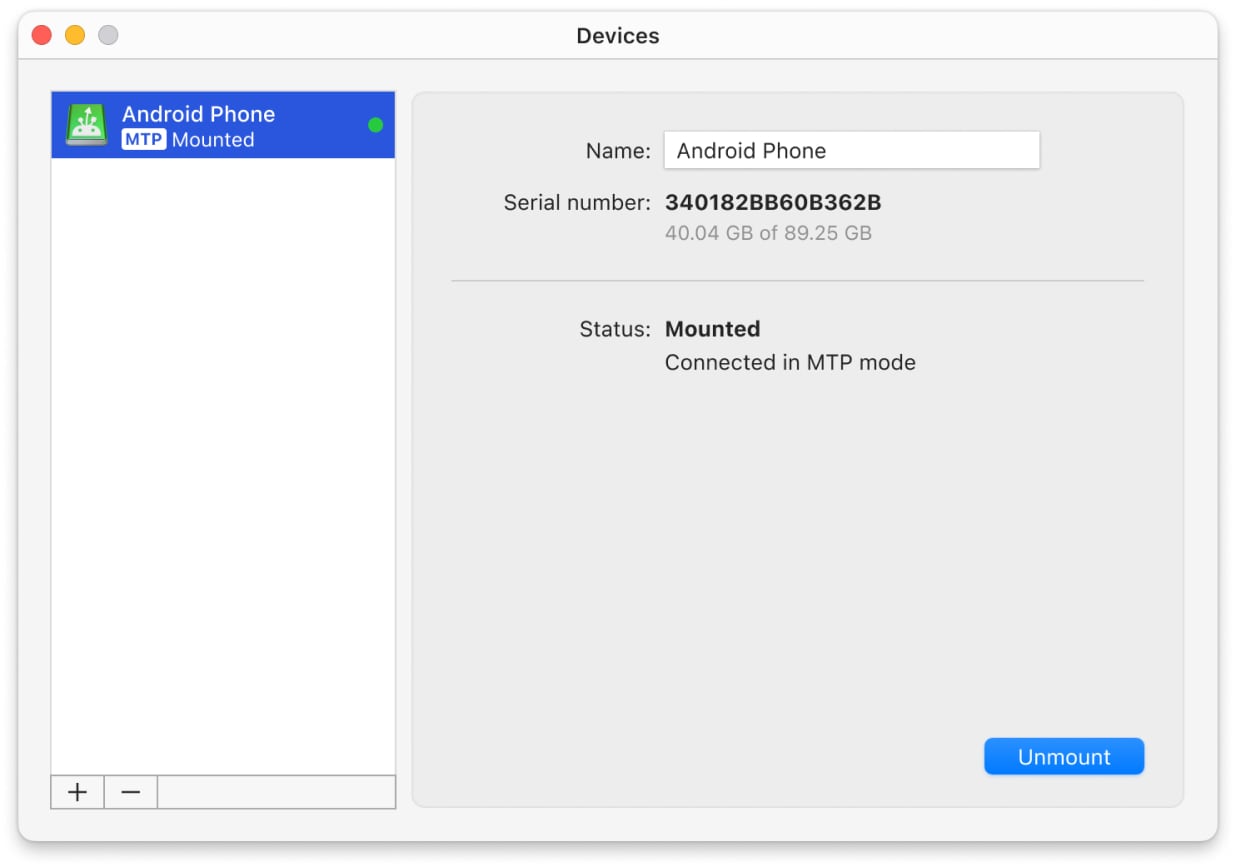
5. When you’re done, it’s a good idea to eject the drive and unmount it in MacDroid, but it isn’t necessary.
If you want to use ADB access:
1. You should first look up how to enable USB debugging on your phone. It’s in System Settings, but its location can vary. Some devices do not offer the option at all, in which case you’ll have to use MTP mode.
2. Start up Android data transfer program MacDroid and click on “ADB mode” in the Add devices section of the sidebar.
3. The Android device will ask for permission to allow access; click “Always allow,” then “OK” to grant the necessary permission.
4. Once your Android appears in your MacDroid sidebar with an ADB icon, click on it.
5. Then click “Mount” in the main MacDroid page to connect the phone. It will appear in your Finder as an external drive. You can then transfer pictures from Android to Mac as needed.
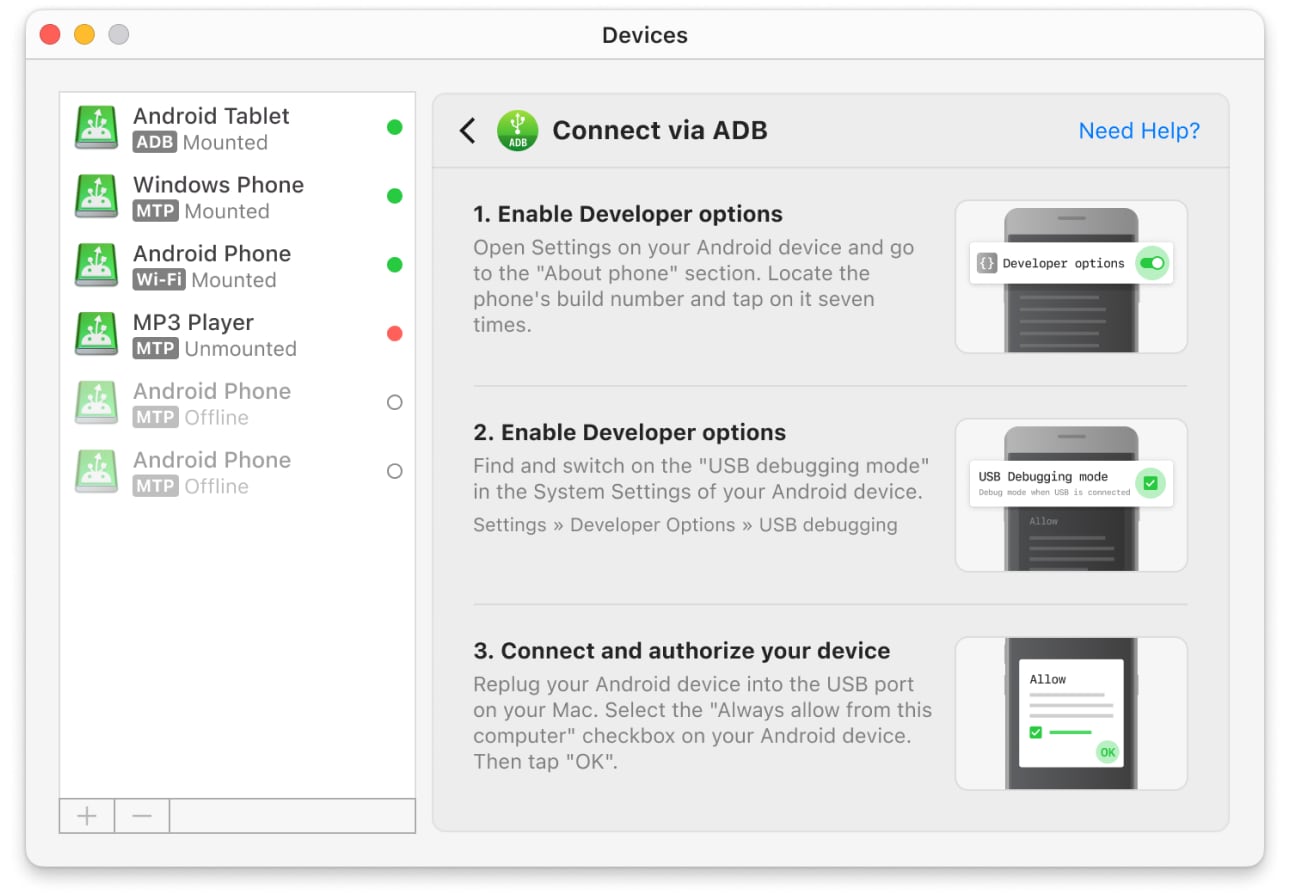
6. When you’re done, be sure to eject the drive from the Mac and unmount it in MacDroid. You risk data corruption if you don’t remove the device safely!
If you want to use Wi-Fi:
- Install MacDroid on your Mac, launch it.
- Make sure both your devices are connected to the same Wi-Fi network.
- Click the “Connect via Wi-Fi” button in the main window.
- Follow the instructions shown on the screen
- Use a QR option or pairing code option.
- Hover your camera at your Mac’s screen if you picked the QR option where the code is displayed. Then your device automatically connects.
- If you choose the pairing code option, open the wireless debugging settings on your Android and select the “Pair device with pairing code” option. Select the Pair via pairing code option in MacDroid. Once your device is detected, select it and click the “Pair” button and enter the six-digit code.
For users with Android versions up to 10, connecting via Wi-Fi works a bit differently. For more information, check out our guide.
No matter what your use case is, MacDroid, as an Android File Transfer Mac alternative, makes communication between Mac and Android a breeze. It makes Android data transfer to the Mac effortless. You don’t need to use a command line or unreliable, unsupported software. It allows you to copy files back and forth as easily as you would with a USB drive. It’s both the simplest and most robust option, providing easy access to regular users and advanced options to high-end users.
MacDroid is quick to set up and transfers Android data more quickly than cloud-based services, saving you time and frustration. If you only want to copy files from Android to Mac, it’s even free!
Top choice of Android transfer tool for Mac
| Top features | MacDroid | Dr.Fone | TunesGo | Vibosoft Android Mobile Manager | MobiKin Assistant for Android | OpenMTP | Phone Mechanic |
| Support for MTP-compatible devices | |||||||
| Files’ preview thumbnails when working with MTP devices | |||||||
| File/Folder transfer | partially | partially | partially | ||||
| Connect via Wi-Fi | |||||||
| Finder integration | |||||||
| On-the-phone file edit | |||||||
| Requires a module installed on Android | |||||||
| Support for the latest Android versions | |||||||
| Price | $1.67/mo | $39.95/year | $39.95/year | $39.95 | $29.95/year | free | $14.99/year |
How to transfer data from Android to Android
This is the easiest type of Android data transfer you’ll ever perform. All the new Android phones come with a built-in app that allows you to grab the data from your old phone during setup. To do so, just follow these simple steps:
- Make sure both phones have plenty of battery
- Double-check that you are still signed-in on your Google Account on the old phone
- Turn on your new phone
- During the setup process, you will be asked to choose the source for our apps and data – select “Old phone”
- Connect the two phones using the cable that came with your new phone. If you don’t have a cable, just click on “A backup from an Android phone” and keep following the instructions to finish the process.
How to transfer data from iPhone to Android
Probably the most popular transfer scenario and the trickiest one, transferring data from an iPhone to an Android device isn’t the most straightforward experience. Due to the intense rivalry between the two operating systems, the means to transfer were not always available and easy to use. We’ve put together a step-by-step guide that will help you easily move data from iPhone to Android in a few steps:
- Turn on your Android phone
- During the setup process, you will be asked to copy data and apps from your previous device
- You can either connect the two phones through a cable ( which is rarely the case due to the different type of connector). If you don’t have a cable, just tap on “No Cable” and then choose “an iPhone device” when asked where you’re transferring data from
- Follow the on-screen instructions to move the files needed
- If you want to back-up all your iPhone data on your new Android device, you can do so using Google Drive
- Once you moved all the needed data, make sure to switch from iMessage to Messages by accessing your iPhone before removing the SIM card from it. Tap “Settings” – “Messages” and set “iMessage to off”.
How to Transfer Files Between Your Windows computer and Android Device
Transferring files between an Android device and a Windows computer is one of the most common tasks a user performs. Luckily, the two operating systems are quite compatible and you can take care of the process directly through your Google Account or using a USB cable. Here’s how it goes:
Through Google
Performing an Android data transfer using your Google Account is one of the fastest ways to manage your data. Simply move your files from one with Google Drive and you can then download them on your computer, or the other way around. Also, if you want to move pictures, there’s the Google Photos app and you have YouTube Music for audio. Keeping the files on your Google Drive gives you instant access from both devices at the same time.
Connecting your Android Device via USB
- Connect your phone using the USB cable that came with it and unlock it
- You’ll see the “Charging device via USB” notification. Just tap on it and go to “Use USB for” to select “File Transfer”
- A new window will open on your computer with the option to “Open files” on the connected device
- Move the files and folders as needed to complete the Android data transfer
- Once you’re done, simply eject the Android phone.
How to transfer files between your Chromebook and Android gadget
If you’re using a Chromebook and you want to easily transfer files to and from your Android smartphone or tablet, there are several ways to do so. Keeping your data synced is important since it allows you to go through everyday tasks with ease. So, if you own a Chromebook and an Android gadget, here’s how you can easily perform an Android data transfer one to another.
Use Your Google Account
It is possible to perform a full transfer without needing a dedicated Android data transfer app. Using your Google Account you can:
- You can upload files easily using your Google Drive. Just put everything from your Android/Chromebook on Google Drive and then download it on the other device easily
- When is comes to music you can use Google Play Music or YouTube Music and rapidly have your favorite songs available on either of the devices
- Google Photos allows you to easily handle transferring photos from Chromebook to Android and vice-versa.
Use a USB Cable
- Unlock your phone and connect it with the provided USB cable to the Chromebook
- Once you get the “Charging device via USB” notification, tap it and select “File Transfer” under “Use USB for” function.
- As you do so, the File app opens on your Chromebook since it recognizes the Android data transfer program you selected. You can immediately start using it to drag and drop files as you wish
- Unplug the USB cable when you’re done and that’s it.
Conclusion
As you can see, transferring files between different platforms is an easy task thanks to the multiple options that help synchronize data between devices. For example, MacDroid provides a simple solution for macOS users who need to transfer data to and from their Android devices. With its straightforward interface and three connection types (MTP, ADB, and Wi-Fi mode), MacDroid makes it easy for you to pair your Android and Mac. Write in the comments about your favorite data transfer method and which devices you pair most often?
Frequently Asked Questions
Transferring files between two Android devices can be done in multiple ways. First of all, you can do the Android data transfer using the built-in app on your new phone asking you to get your data from your old one. Just connect the two phones with a cable or to the same Wi-Fi connection and you can easily move the files. If you’re not doing a new set-up, you can simply use your Google Account to easily move files and folders from one Android to another.
If your old phone is an Android as well, just use the steps described in the above question. If you’re switching from an iPhone, you’ll have to add a few steps to the process and do it without an Android data transfer app. Not being able to connect the old and new phone with a cable, you will need to select “No Cable” when prompted and use the backed-up data on your Google Drive to move the files. Also, make sure not to forget to switch from iMessages to standard Messages on your old phone.
There are plenty of alternatives when it comes choosing an Android data transfer program. Almost all phone manufacturers using Android developed their data transfer solution and here are the best out there.
- Samsung Smart Switch – Samsung has a huge share of the Android phones market so it’s natural their app is among the most-used ones. It delivers a complete service to move files and folders between Android devices
- LG Mobile Switch – the proprietary data transfer from LG, this app makes it easier for LG users to transfer data between two Android devices
When connected with an USB cable to a computer or another gadget, Android devices will show you a screen where you can choose what the USB connection will be used for. You can either set if for File Transfer, charging, or a couple of other options depending on the device you’re connecting to. Select File Transfer from the list if you want to do an Android data transfer and use any of the steps described above to access Android from Mac!

